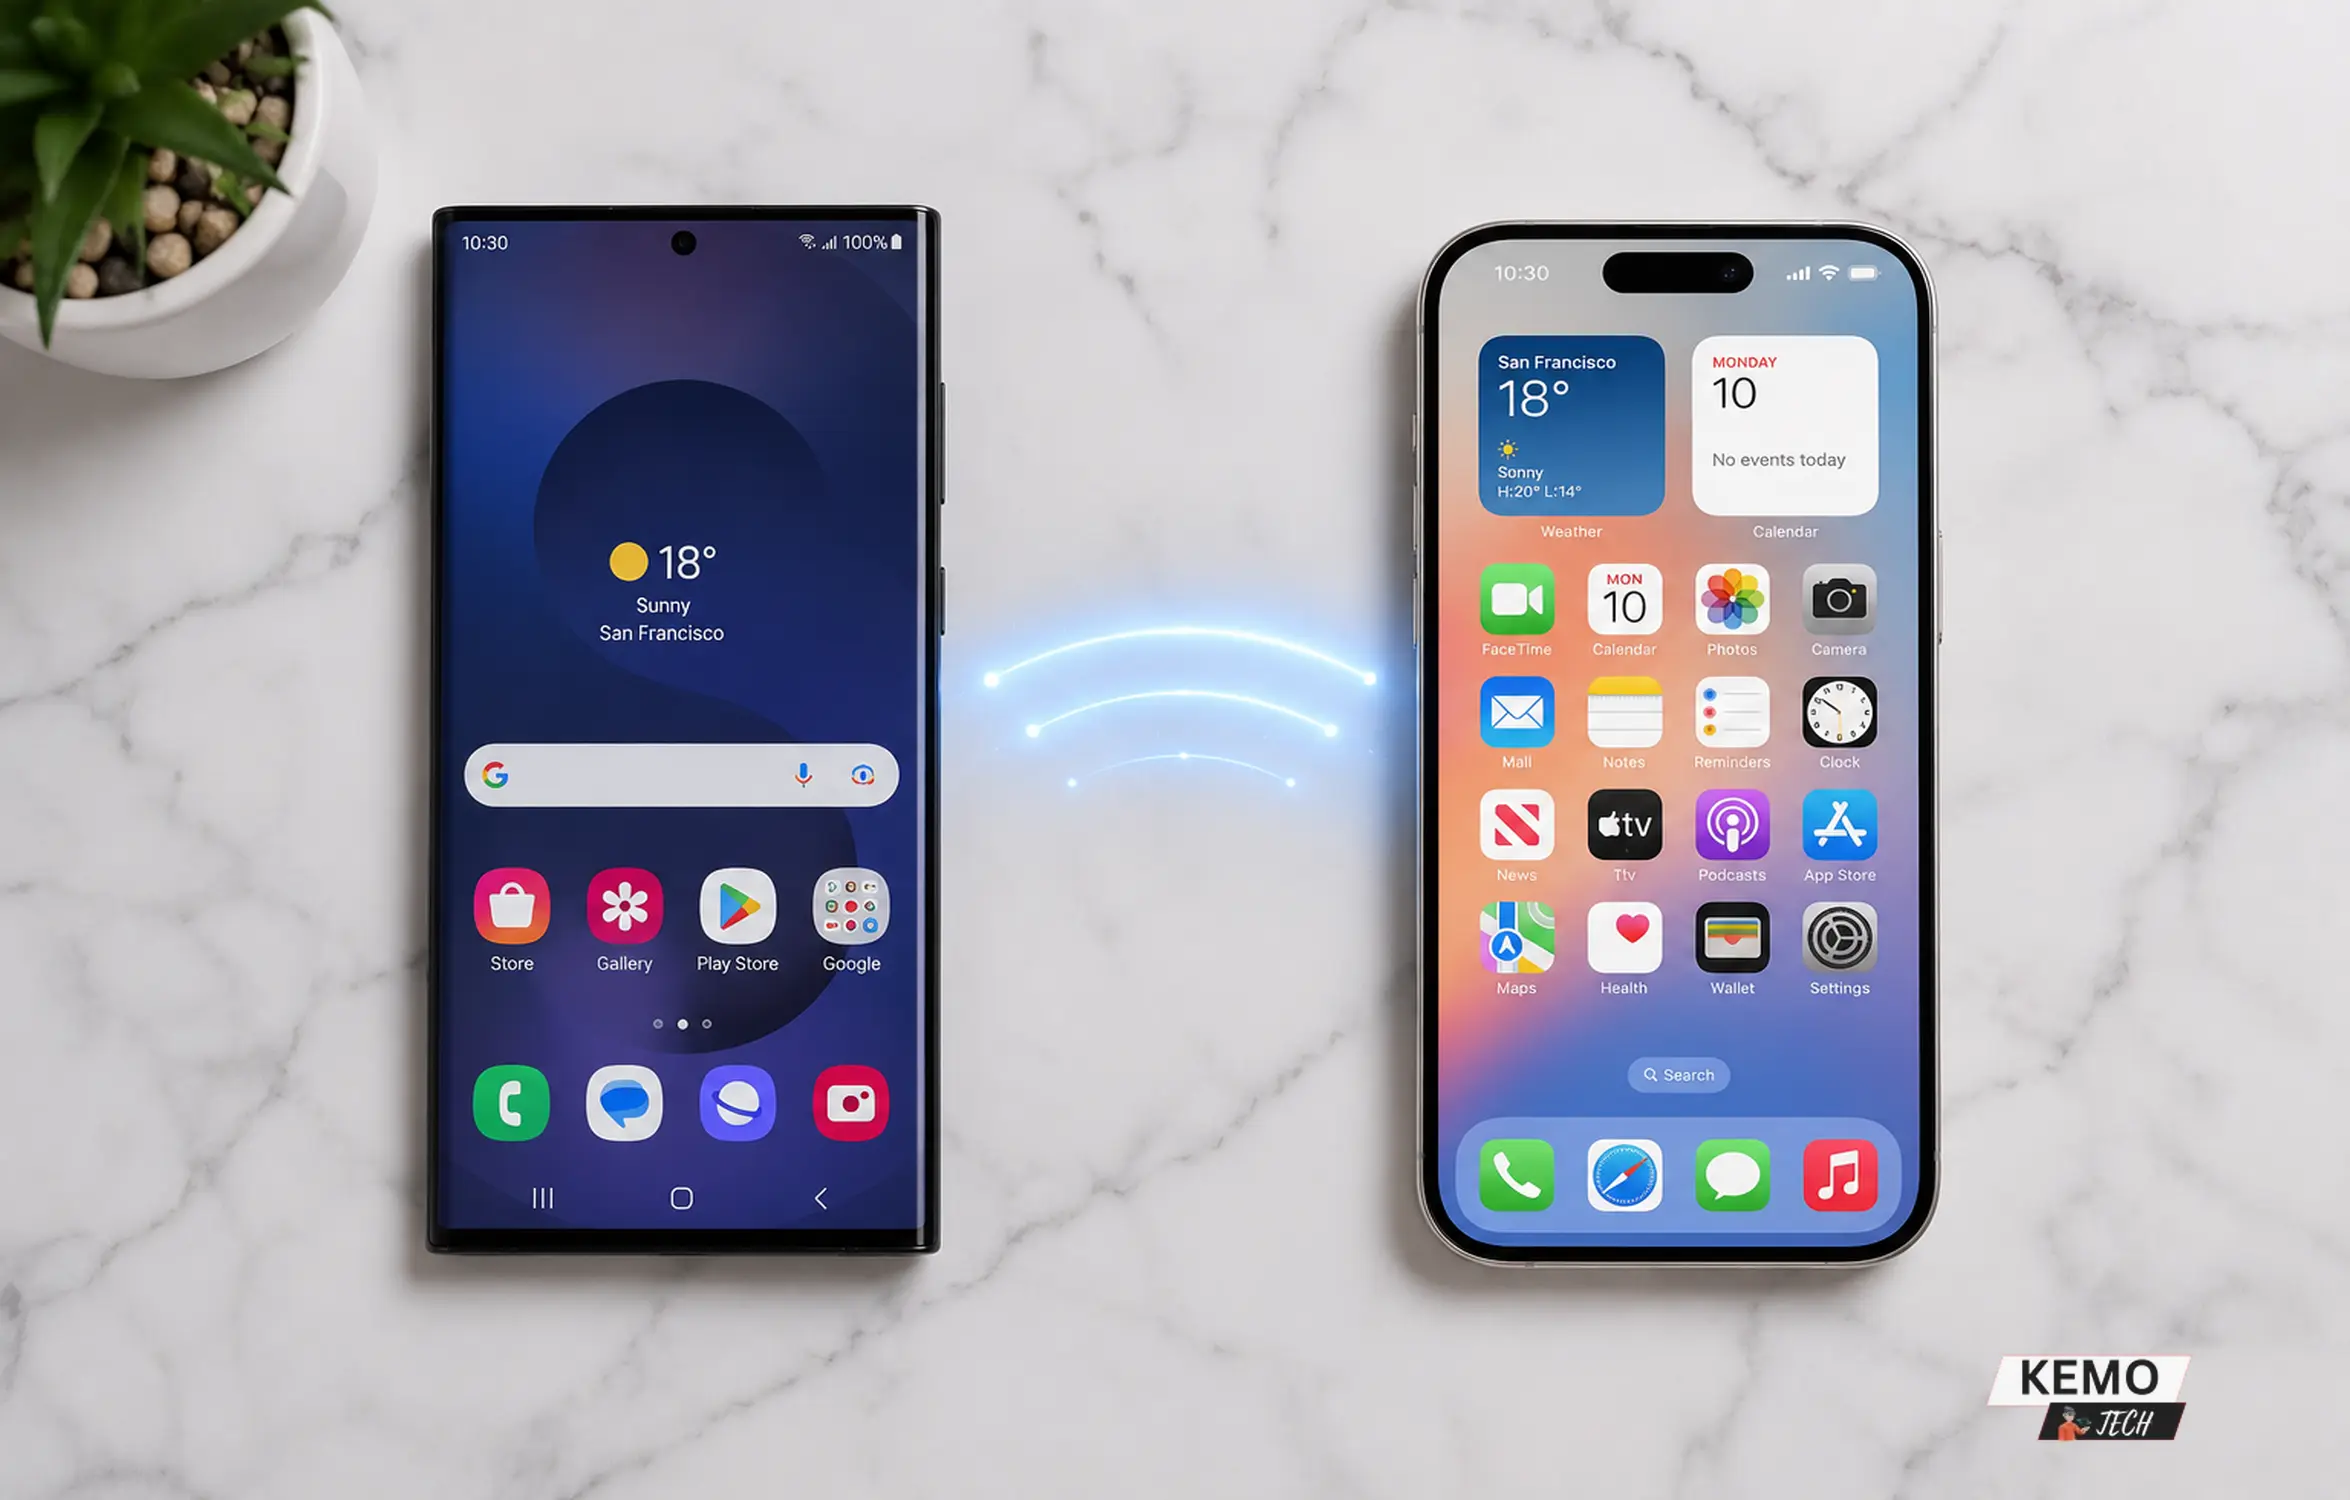
iMessage is one of the most loved features for iPhone users. It turns ordinary text messaging into something far more interactive and fun complete with read receipts, typing indicators, media sharing and end-to-end encryption. If you’ve just bought an iPhone, switched from Android or simply turned off iMessage in the past, enabling it is a quick process.
In this guide, we’ll show you how to sign in to iMessages, walk through every activation step and cover troubleshooting tips — with screenshots to make the process as smooth as possible.
What is iMessage and why Use It?
iMessage is Apple’s proprietary messaging service that works over the internet instead of traditional SMS/MMS. It’s available on iPhones, iPads and Macs, allowing you to send and receive messages between Apple devices without using your SMS plan (as long as you have Wi-Fi or mobile data). Messages can include text, photos, videos and even interactive features like stickers and reactions. It also supports end-to-end encryption, ensuring your conversations remain private and secure.
Key Benefits of iMessage
- Free to use – iMessage works over Wi-Fi or mobile data at no cost.
- End-to-end encryption – Your conversations stay private and secure.
- Rich media sharing – Send photos, videos, voice messages and documents.
- Read receipts & typing indicators – Know when your message has been seen.
- Works across Apple devices – Syncs seamlessly between iPhone, iPad and Mac.
- Fun extras – Stickers, GIFs, Memojis and message effects like Confetti and Fireworks.
iMessage vs SMS: What’s the Difference?
Many iPhone users aren’t sure when they’re using iMessage and when they’re sending a regular SMS. Here’s a quick breakdown:
| iMessage | SMS/MMS | |
|---|---|---|
| Cost | Free (uses data) | Carrier charges may apply |
| Works with | Apple devices only | All phones |
| Encryption | End-to-end | None |
| Bubble colour | Blue | Green |
| Read receipts | Yes | No |
| Media quality | High | Compressed |
The easiest way to tell which one you’re using is the bubble colour. Blue means you’re on iMessage. Green means a standard SMS is being sent instead.
If you’re seeing green bubbles when messaging another iPhone user, it usually means iMessage is not yet set up on your Apple account — which is exactly what this guide will fix.
What You Need Before You Start
If you’re wondering how do you set up iMessage for the first time, start by making sure you have everything below ready before diving into the steps.
An Apple ID / Apple Account – Required to activate and use iMessage. If you don’t have one, create a free Apple account at appleid.apple.com before proceeding.
- Stable Internet Connection – Wi-Fi or mobile data will work.
- Latest iOS Update – Helps avoid compatibility issues.
- Working SIM Card (for activation) – Apple sometimes sends a verification SMS to activate iMessage.
Step-by-Step Guide to Enable iMessage on iPhone
Getting iMessage up and running on your iPhone only takes a few simple steps. Here’s exactly what to do:
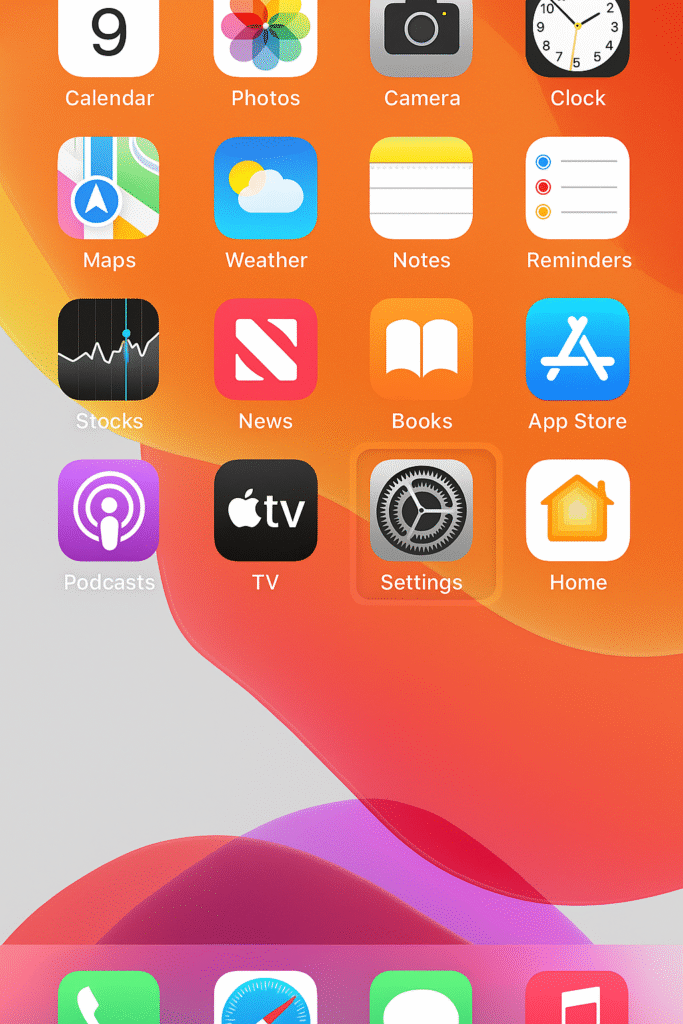
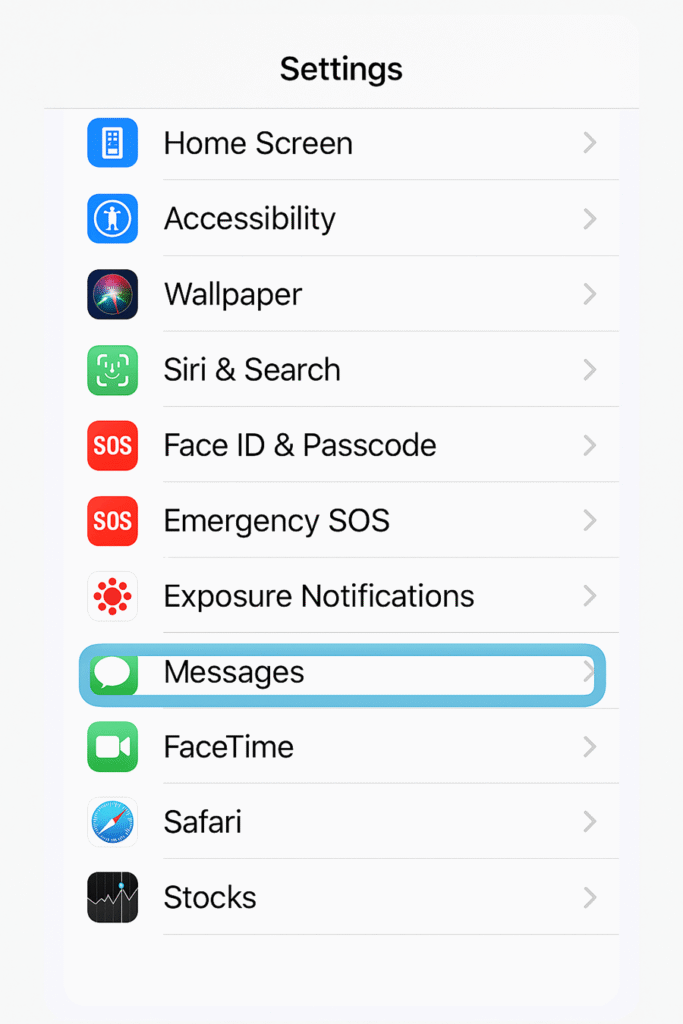
Step 1: Open the Settings App
- On your iPhone’s home screen, look for the Settings icon (it looks like a gray gear).
- Tap it to open.
Step 2: Navigate to the Messages Section
- In the Settings menu, scroll down until you see Messages.
- Tap on Messages to open its settings.
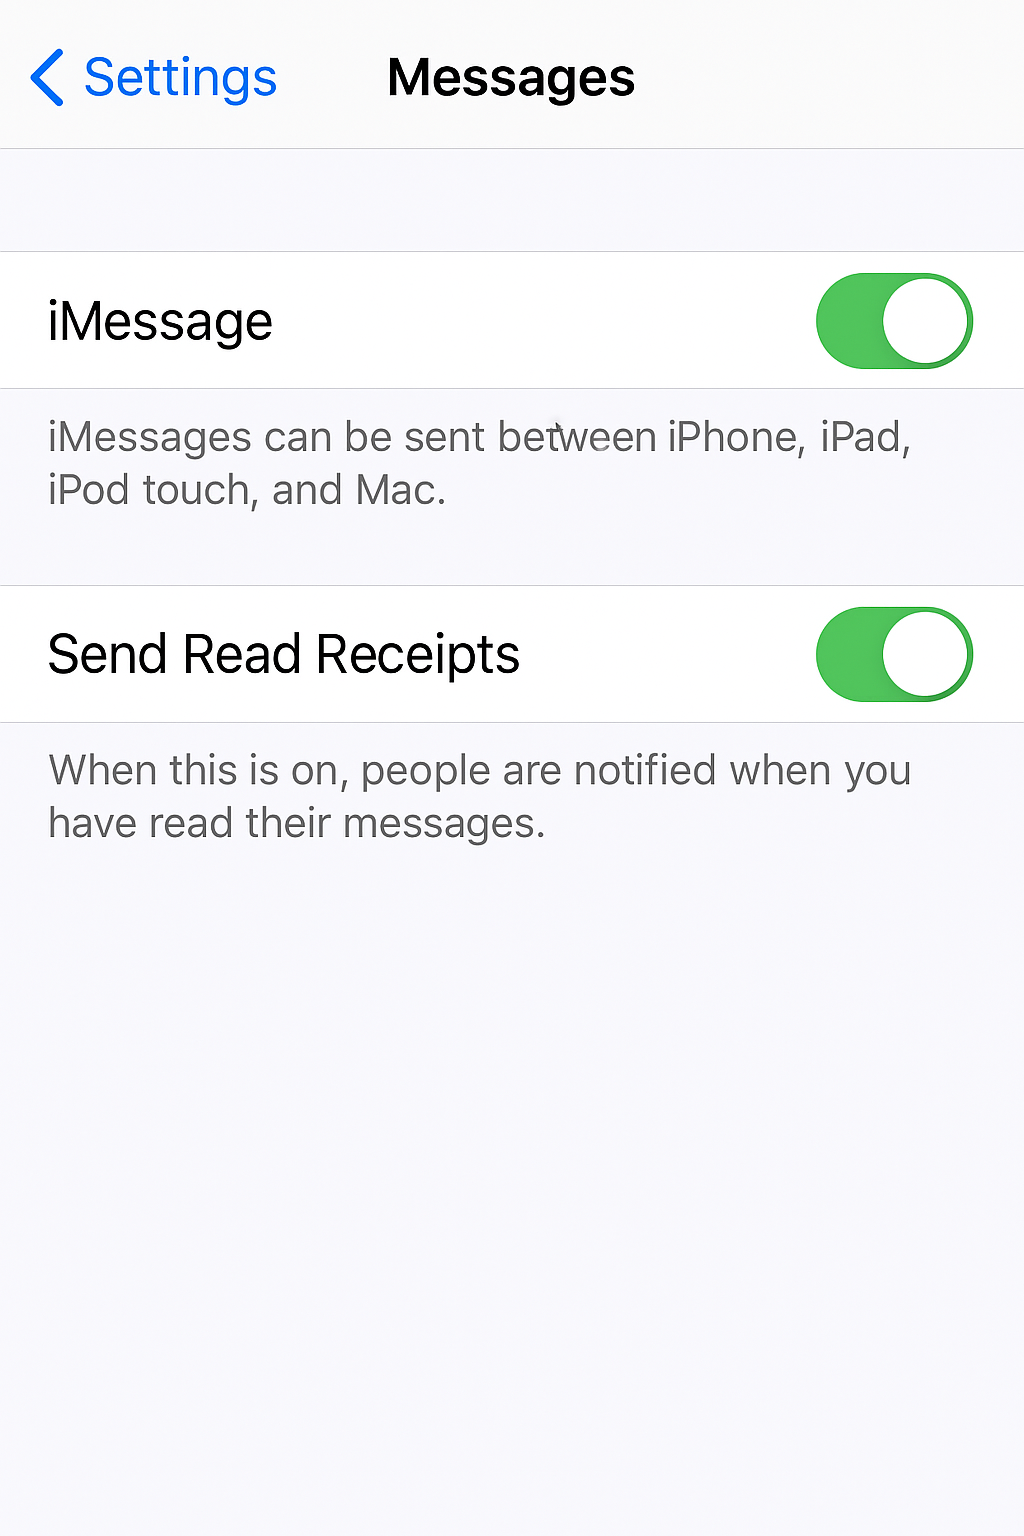
Step 3: Turn On iMessage
- At the top of the Messages settings, you’ll see a toggle switch labeled iMessage.
- If it’s off, tap the switch so it turns green indicating it’s enabled.
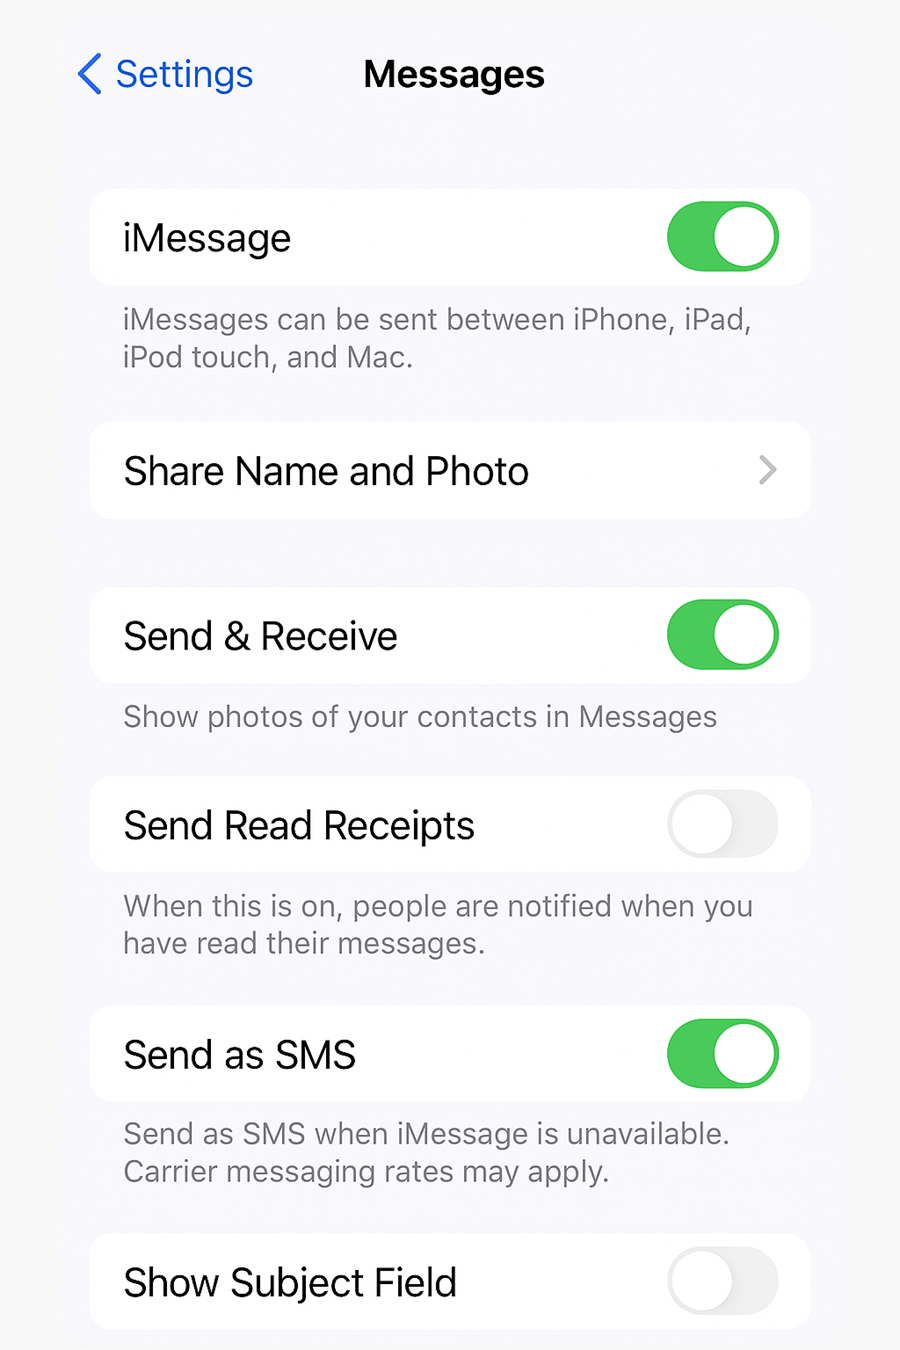
Once you turn it on, Apple will attempt to activate iMessage. This might take a few seconds to a minute. You may see a message that says “Waiting for activation…” doesn’t worry this is normal.
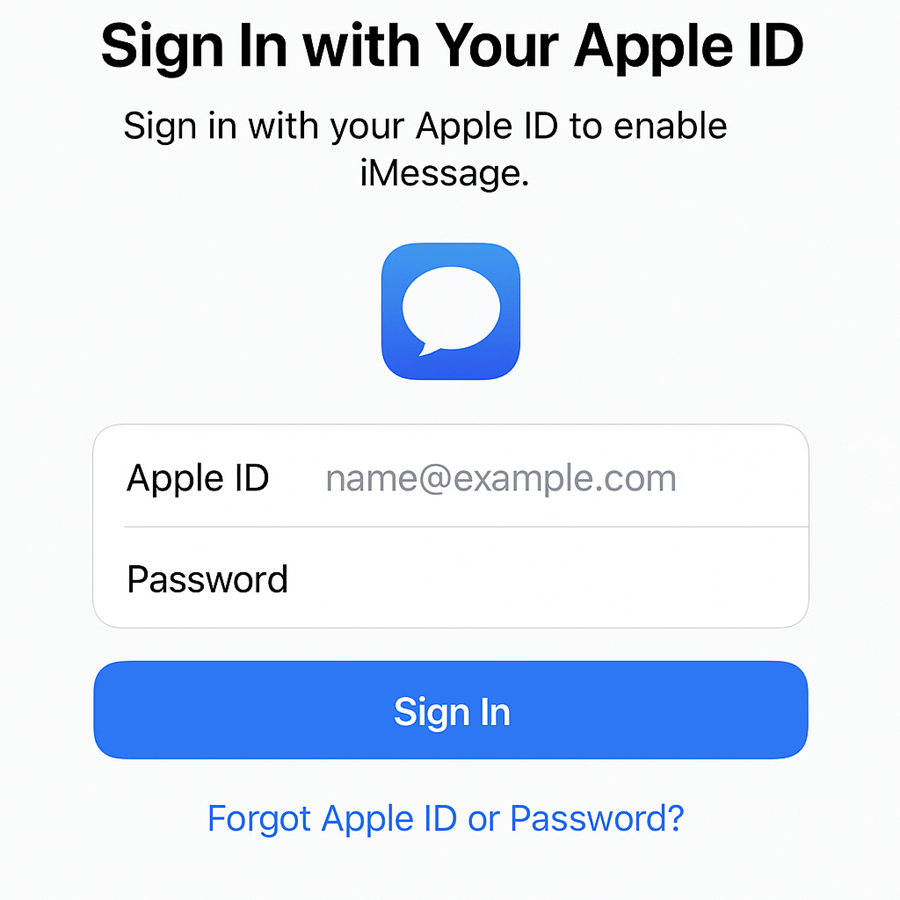
Step 4: Sign In to iMessages with Your Apple ID
- Some iPhones automatically link iMessage to the Apple ID already signed in on your device.
- If prompted, enter your Apple ID email and password.
- This ensures iMessage works across all your Apple devices.
Step 5: Check Send & Receive Settings
Once iMessage is enabled, you can choose which phone numbers and email addresses can send and receive iMessages on your device.
- In Messages settings, tap Send & Receive.
- You’ll see a list of your linked phone numbers and email addresses.
- Select the ones you want to use for iMessage.
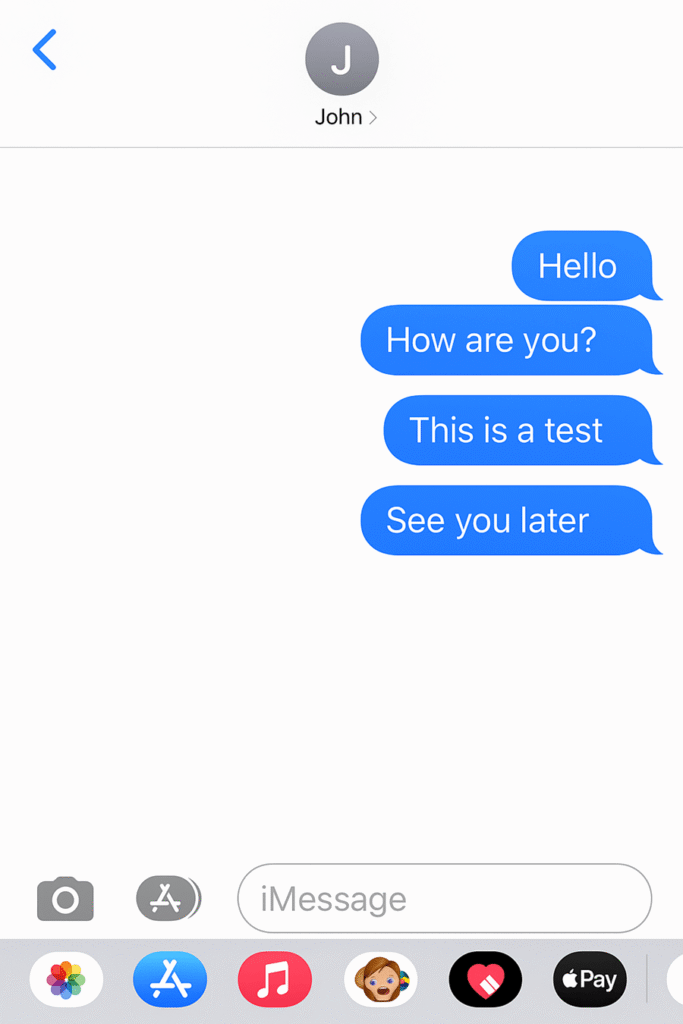
Step 6: Test iMessage
- Open the Messages app on your iPhone.
- Start a new conversation with another iPhone, iPad or Mac user.
- Type a message and send it.
- A blue bubble means the message was sent via iMessage. A green bubble means it was sent as a regular SMS — either the recipient doesn’t use an Apple device or their iMessage is turned off.
Troubleshooting iMessage Activation Issues
Sometimes, iMessage doesn’t activate right away. If you see “Waiting for activation…” for a long time or get an activation failed message, here are some fixes:
1. Check Your Internet Connection
Verify that your mobile data or Wi-Fi signal is strong. iMessage won’t activate if there is no internet.
2. Verify Date & Time Settings
- Go to Settings > General > Date & Time.
- Turn on Set Automatically.
- iMessage activation may be prevented by an incorrect date or time.
3. Sign Out and Back Into Apple ID
- Tap your Apple ID under Settings > Messages > Send & Receive.
- Select Sign Out.
- Then sign back in.
4. Restart Your iPhone
A simple restart often resolves temporary glitches.
5. Contact Apple Support
If none of the above works, Apple Support can check your account status.
Customizing Your iMessage Experience
Once iMessage is enabled, you can enhance it with personalization and fun features:
Enable Read Receipts
- Go to Settings > Messages and toggle Send Read Receipts on.
- This helps users know when their messages have been read.
Use Message Effects
- After typing your message in the Messages app, long-press the Send button (blue arrow).
- Choose effects like Balloons, Confetti, Fireworks or Invisible Ink.
Create a Memoji
- In Messages, tap the Animoji icon (monkey face).
- Create your personalized Memoji for use in chats.
You’re All Set
Enabling iMessage on your iPhone only takes a few taps, but it unlocks a powerful messaging experience packed with features that go beyond standard texting. With this guide and the included screenshot references, you should be able to get iMessage up and running without confusion.
Once activated, you can enjoy faster, richer, and more secure conversations with friends, family and colleagues all from the palm of your hand. Plus, you’ll get access to fun extras like stickers, GIFs and Memojis that make chats more lively. Whether you’re sharing photos, coordinating plans or just catching up, iMessage keeps everything seamless and in sync across your Apple devices.
Frequently Asked Questions About iMessage
Is iMessage free to use?
Yes, iMessage is free over Wi-Fi or mobile data. However, SMS charges may apply for activation or when sending messages to non-Apple devices.
Can I use iMessage without a SIM card?
Yes, as long as you’re signed into your Apple ID and have Wi-Fi.
Why are some messages green instead of blue?
Green bubbles mean the message was sent as SMS/MMS, not iMessage. This happens if the other person isn’t using an Apple device or if iMessage is turned off.